

Weaving has become a favorite project of mine to teach. If you have taught weaving before, you know it can be an exhausting lesson to teach! Those moments when you look up and see a line of students needing your help... you wonder... why did I think this was a good idea???
Yes, students can make a mess of things and can make mistakes that make it hard to finish the weave. I have evolved my lesson over time and find it gives me a much shorter line!
My students create their own loom out of cardboard. I recommend a thin cardboard, my favorite is a pizza box top. Here is how I start... with a 6x10 piece of thin cardboard, but any size works of course!
Day 1 - The first, we draw a line at the top and bottom of the cardboard about a 1/2 inch thick or the thickness of their thumb.

Next... line up the ruler against the left side. Point out the loom size, mine is six inches wide. Make a line to mark all 6 inches, (5 lines, 6 spaces... this can confuse some students). Do the same on the other end.


Next... make two marks in between each inch. You can use a ruler to mark 1/3 inches, but it is very difficult with some rulers and takes up the rest of class. I find the students are less frustrated to just make two marks between. I should mention, even with 6th graders, I walk around and check to see they have every step correct before moving on. Make the marks on both ends.

When you are sure students have their marks correct, draw them to the top on both ends.

ONLY on the right and left side... draw a straight line connecting the marks on the top and bottom. These two lines will help students keep the warp straight. When finished drawing the lines, CUT ALL THE TABS.

Last, after cutting all the tabs on the top and bottom, glue a 1/2 inch thick piece of cardboard just under and above the lines first drawn at the top and bottom. This lift will help weaving for students who struggle with needles.

Day 2 - Stringing the warp is easy but students can make mistakes. I always start with a long piece of yarn taped on the back, stretching it towards one of the corners on the opposite end. Flip the cardboard over to the front, demonstrate to the class how to wrap the yarn around the TABS, then down and around the opposite tab.

Once the loom has the warp on correctly, the back of the loom should look like this, two ends taped on the back.

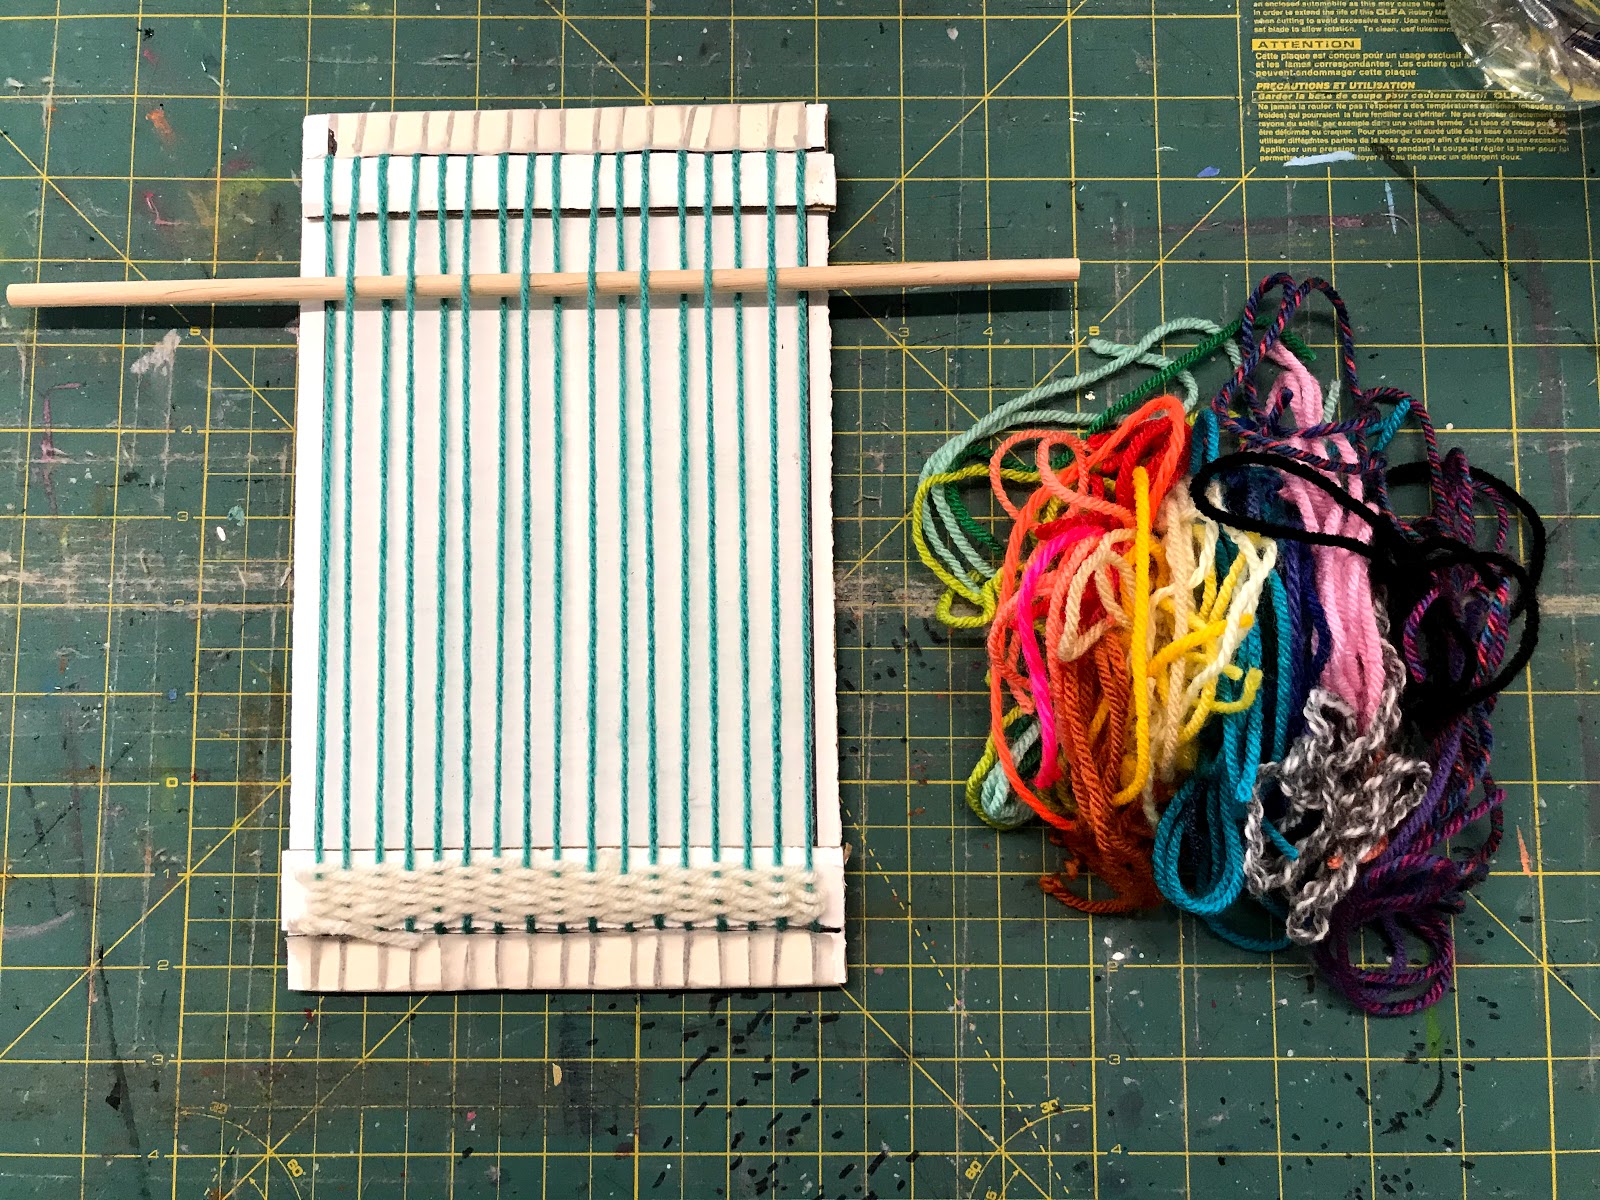
This is how the front should look...

For your students who did a rough job cutting the tabs, I recommend taping down the top and bottom of the tabs. This prevents them sliding off. You might think... "They won't slide off..." And then you regret that thought! 😆

We are ready to weave! I precut yarn for the my students, about a yard long for this first few rows of tabby weave. I teach students how to use a shed stick and fork for beating down.

I have students tie a single knot to tie on their yarn. You do not have to tie on, most people just start weaving and weave the ends in the weaving. I find it reduces frustration with students to tie on.

Right away I show students how to use a shed stick. I bought these sticks in a pack at Hobby Lobby. A pencil works too until it is sharpened...
I am right handed, so... I weave fast right to left. I encourage right handers to weave the shed stick going left to right. Then the opposite for the left handers. I am not sure this picture shows it very well, but shed sticks save a lot of time, I am able to stick the needle under the warp threads lifted by the shed stick, and not have to physically weave. Now, going right to left, I have to weave back the opposite by hand.

The biggest mistake students make, is pulling too hard across when pulling the weft through. Demonstrating how to make an arch at the top and keeping it loose is a must! This will help keep the weave square.

A box of plastic forks is about $.99. It is a great tool for pulling down the weft, students love using them and it helps get them in the routine of weaving the weave loose.


Once students run out of the first piece of yarn, they have woven enough rows of tabby weave to start making fringe or Rya. You MUST have at least 5 rows of tabby weave to anchor the Rya.

Weave the remaining amount of yarn so it is secure and choose the yarn you are using for Rya.
I use the shed stick as a good length to have students cut... give or take and inch or two, it really doesn't matter. I collect about 5 pieces of regular yarn for this type of loom with the width of warp we are using.

Start with two warp threads, lift them up and lay the MIDDLE of the yarn on TOP.

Take the ends of yarn from the right and wrap under and threw the right side warp thread.

Take the ends of yarn from the left and wrap under and threw the left side warp thread.

Pull slightly up and down to rest on top of the tabby weave.


Work all the way across the loom, taking two warp threads at a time.

If you run into the situation where you have an odd number... you can do the Rya Knot with three warp threads. Our loom does give an odd number, so we have one with three.

I like two rows of Rya. The first row started left to right. The second row is right to left. I broke up the three warp threads by going back to just two. Then when I reach the other side, I have used three warp threads on the second to last Rya. This visually balances it better, leaving the last one to just two warp threads.


If you do not like uneven Rya, you can give it a trim. I tens to like this look. Some people will trim it straight, diagonal or to a point. Anything goes!

When students are finished with the Rya, I have them tie on a new piece and start a normal tabby weave. The warp threads will straighten themselves.


When weaving lessons are done, there is always a bunch of yarn scraps. I organize it in containers for Rya. Students can quickly pick up a variety of colors, plus little waste! I also keep a Yarn Scraps bin for all pieces longer than a 6" plastic needle. This helps with students dumping scraps in good yarn or the Rya bins.


Here are some beauties!!!


Love these! We use rulers as shed sticks when I teach weaving. It works really well.
ReplyDelete