
Did you ever have a lesson you taught a handful of times until you mastered it? I finally have mastered teaching needle felting to my 6th graders. Here is my favorite way, which results in very high level finished works...
I encourage natural subjects, animals are the best, but then simple landscapes. However, I can be talked into any subject if a student draws something that will translate well in wool. Not everything works... small details and tiny drawings do not work.
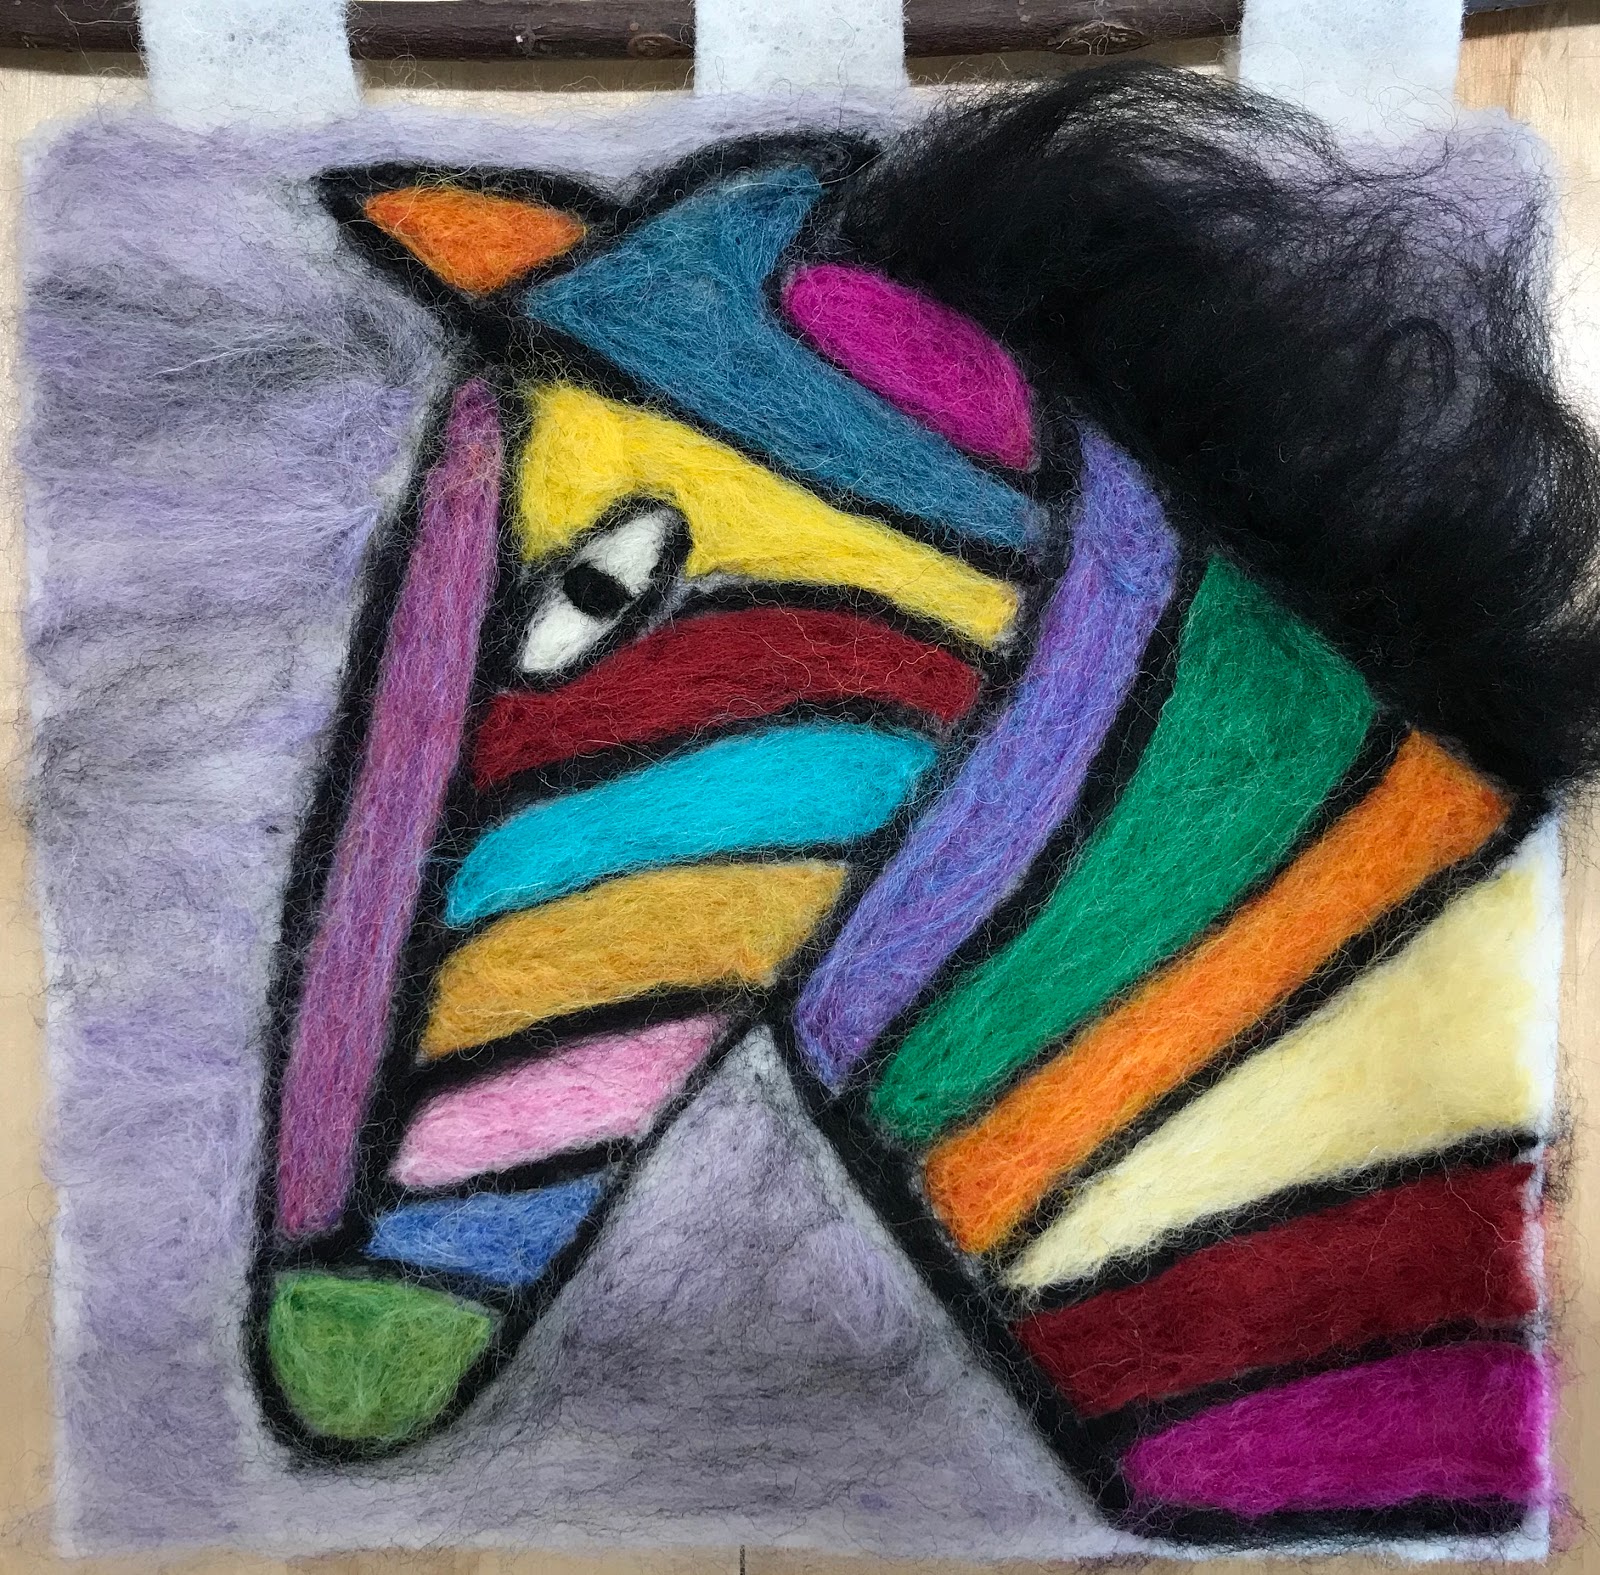
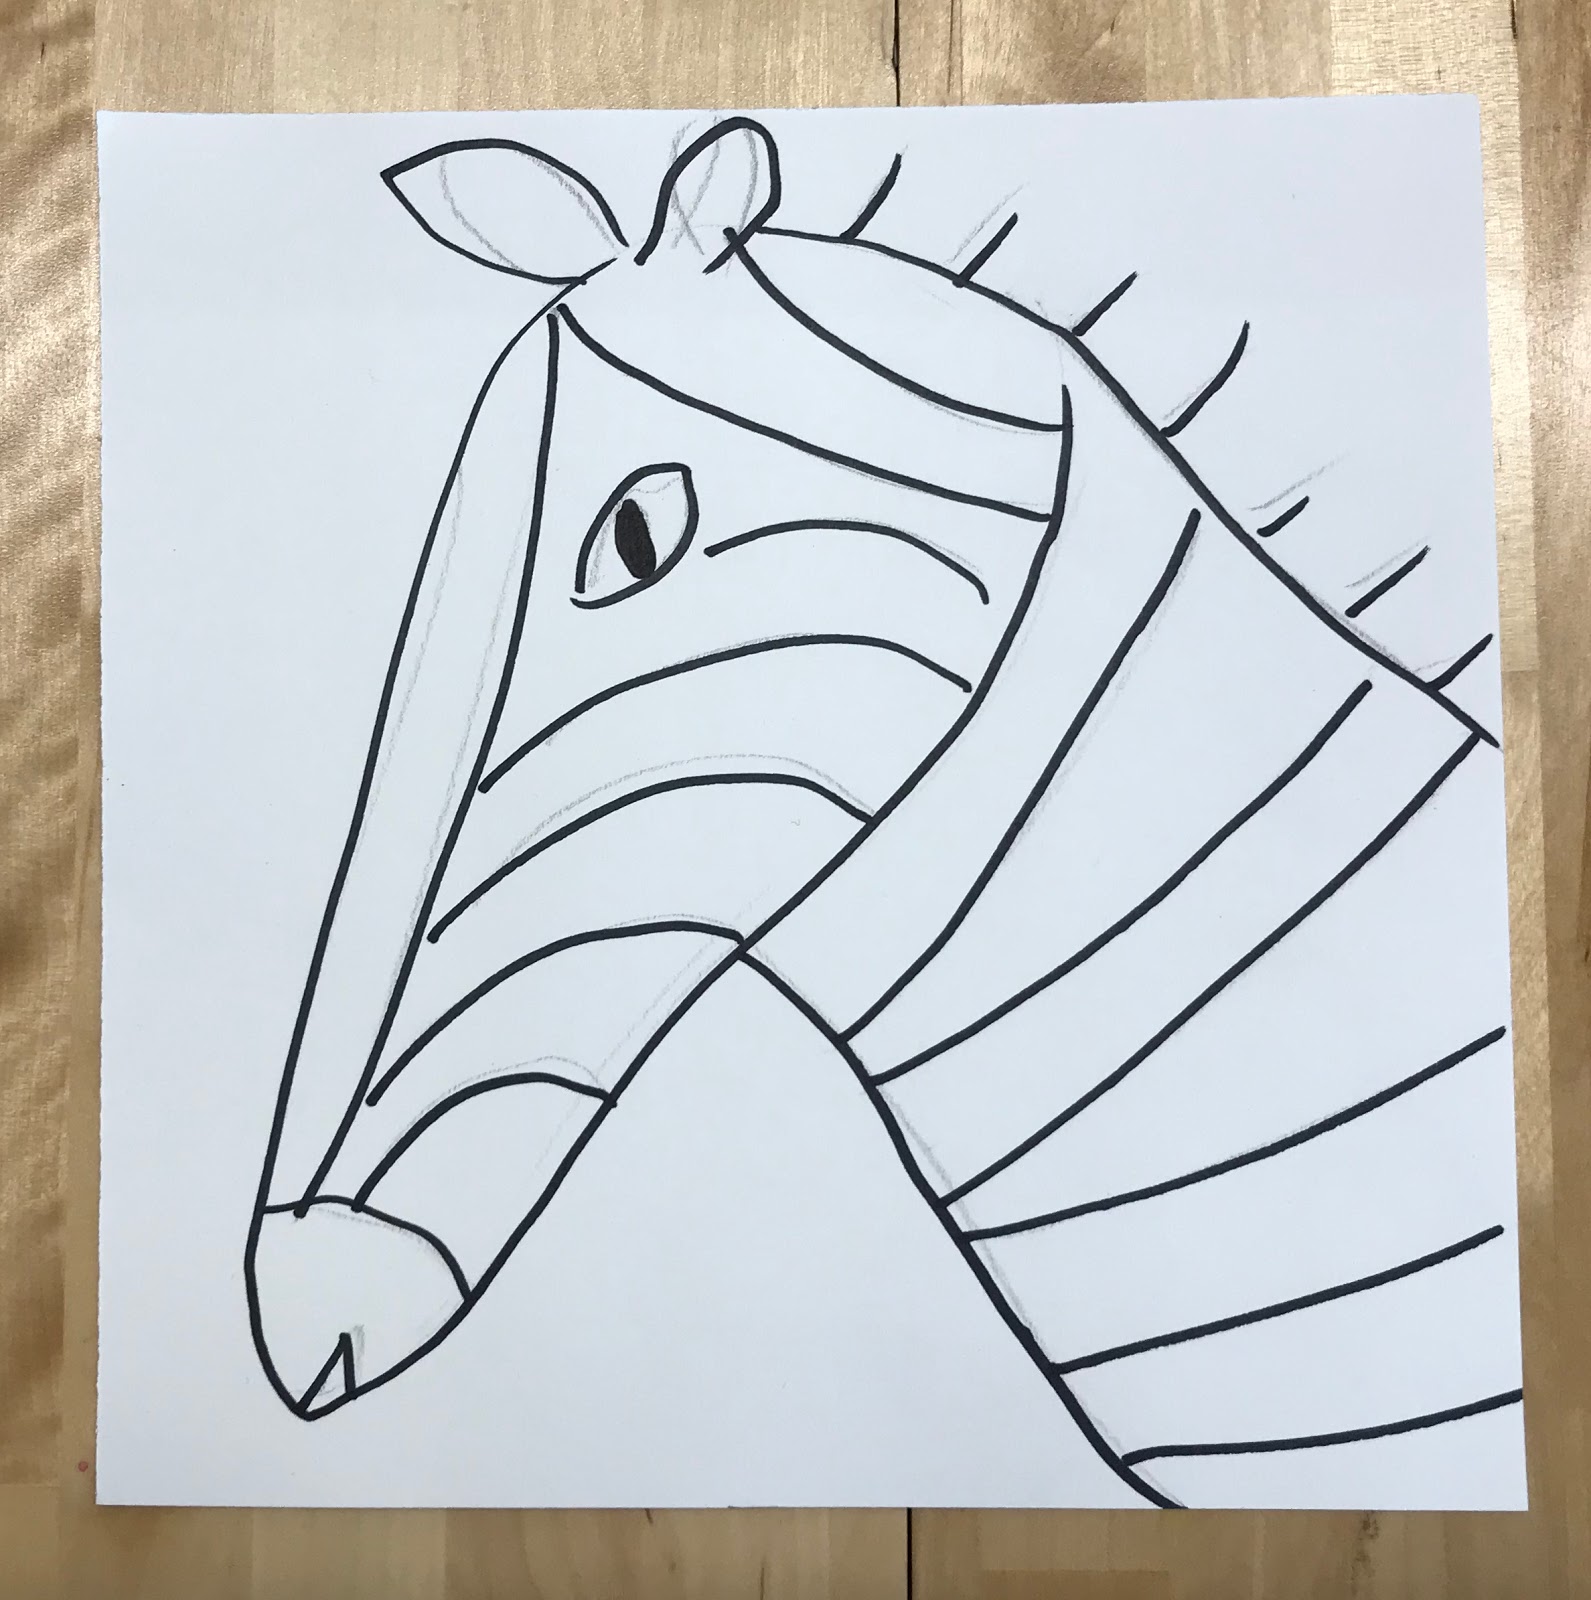
First, I have students draw their ideas on a 8x8 square, the same size wool felt we will felt. I always provide artists to be inspired by. This time, students views many works of Melanie Mikecz and Clare Youngs. Both excellent illustrators of animals. The next few pictures are my colorful zebra that I created inspired by Melanie Mikecz.
I should mention my wool supplier... she's the BEST! Sue Bunch from
Back to Back Fiber ! It is the best wool and Sue is so wonderful to work with! You can find their kits and materials in the Nasco Catalog.

After the drawing is approved by me, mostly to verify that it will translate well in wool, students outline with black Sharpie marker.
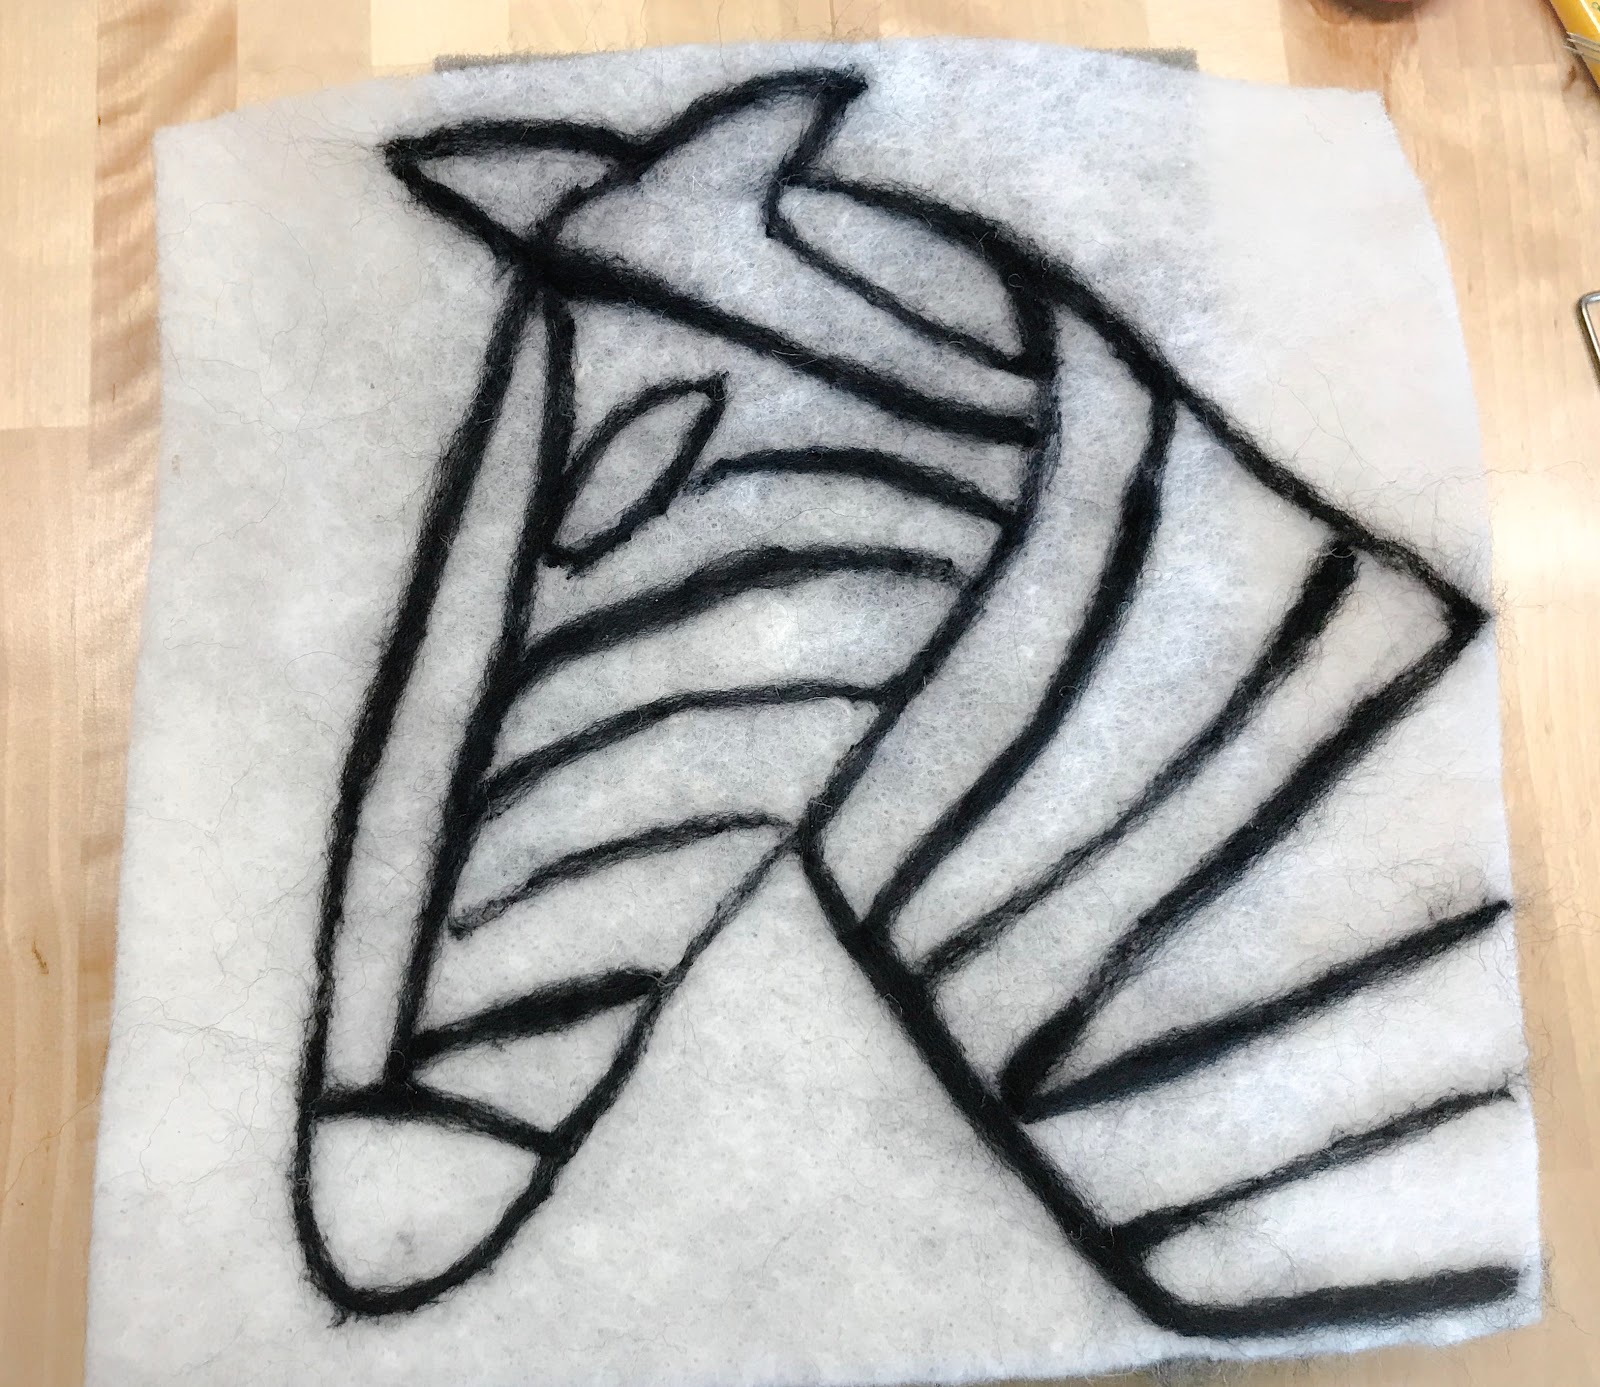
Once traced, students lay on top of the drawing their piece of wool felt. It is easy to see the drawing through the thin felt. Students trace with Sharpie on to the wool felt.


Next, students start to needle felt the drawing with black roving. You could use black wool yarn, but I must say... I prefer the roving. If the roving is thick, I show students how to divide it into thin sections, about the thickness of a piece of yarn.


Then work your way around the whole design, outlining with the black wool roving.


Once finished, make a color plan! When students start filling in with the colored roving, stress thin pieces. I always show students how my hand is able to be seen through the roving, such a thin piece it is transparent.

Some students will need to fill in the whole background, some will not. They can get a little roving heavy. I will go by and pull some off it it looks a little too thick. But I don't catch everyone! :)
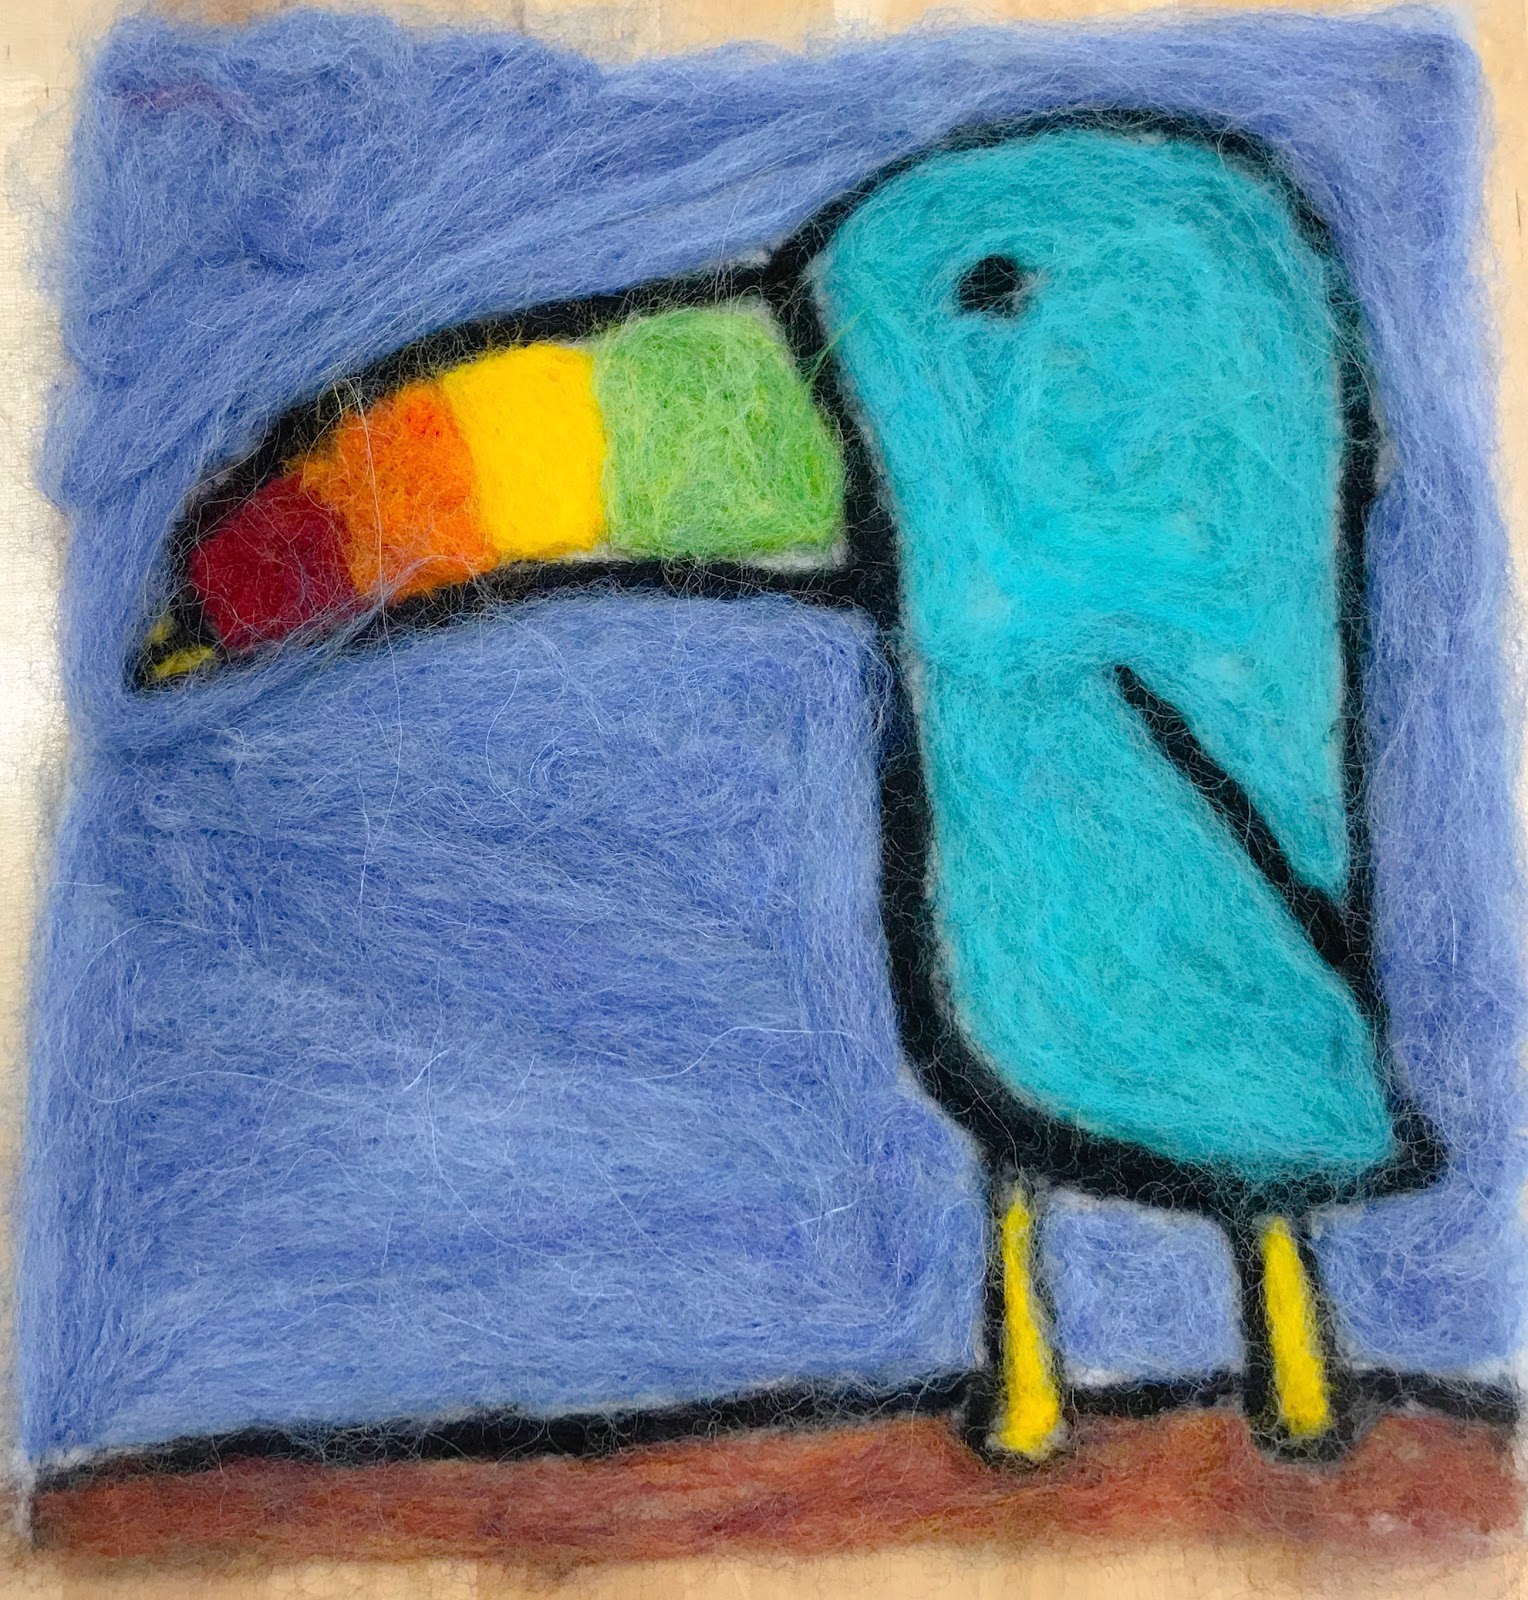
Here are some GREAT works by my students!!!


Once you lay the roving over the project how do you felt it...do you have a tutorial....or supply list.
ReplyDeleteHi this looks amazing. Can you take off the work while other classes use the felting foam blocks or does it ruin the work? Thanks
ReplyDeleteWhat do you think the cost is per student? I wish I could try this!
ReplyDeleteWhere do you get your pre-felt? Do you purchase larger and then cut down to 8x8? Thank you for the tips. I just wet felted landscapes with 1st graders starting out in zip lock bags. Their wool paintings turned out great with a impressionistic style.
ReplyDeleteAwesome art! I’m now learning how to needle felt, and have decided to narrow my blog list down to things related to this art form. I’m many decades older than your young artists, and I hope to get some you new ideas from your blog!
ReplyDelete